As you already know, I have a dynamic IP Address at my home. However I want to access this network from the outside. The easiest way is to setup a DynDNS service. But instand of using a public service, I wanted to use my own - simply because I can ;)

Software used
In my case I use my oracle VM with Ubuntu and a small, lightweight Ruby DynDNS Server by arkanis: https://github.com/arkanis/minidyndns
Installation
First let's install ruby
$ sudo apt install rubyNow we need to download the three files
- dns.rb
- config.yml
- db.yml
$  sudo mkdir /opt/dns
$  cd /opt/dns/
$  sudo wget https://raw.githubusercontent.com/arkanis/minidyndns/master/dns.rb
$  sudo wget https://raw.githubusercontent.com/arkanis/minidyndns/master/db.example.yml -O db.yml
$  sudo wget https://raw.githubusercontent.com/arkanis/minidyndns/master/config.example.yml -O config.yml
Configuration
We start with the config.yml and adjust our DynDNS Domain. This will have sub-domains for all clients like "client1.dyn.heig.net".
domain: dyn.heig.net
If you want to limit the DNS / HTTP Server to a specific network interface, you can bind it to it's ip address. Also if you do not supply a certificate for the HTTPS Server, disable HTTPS.
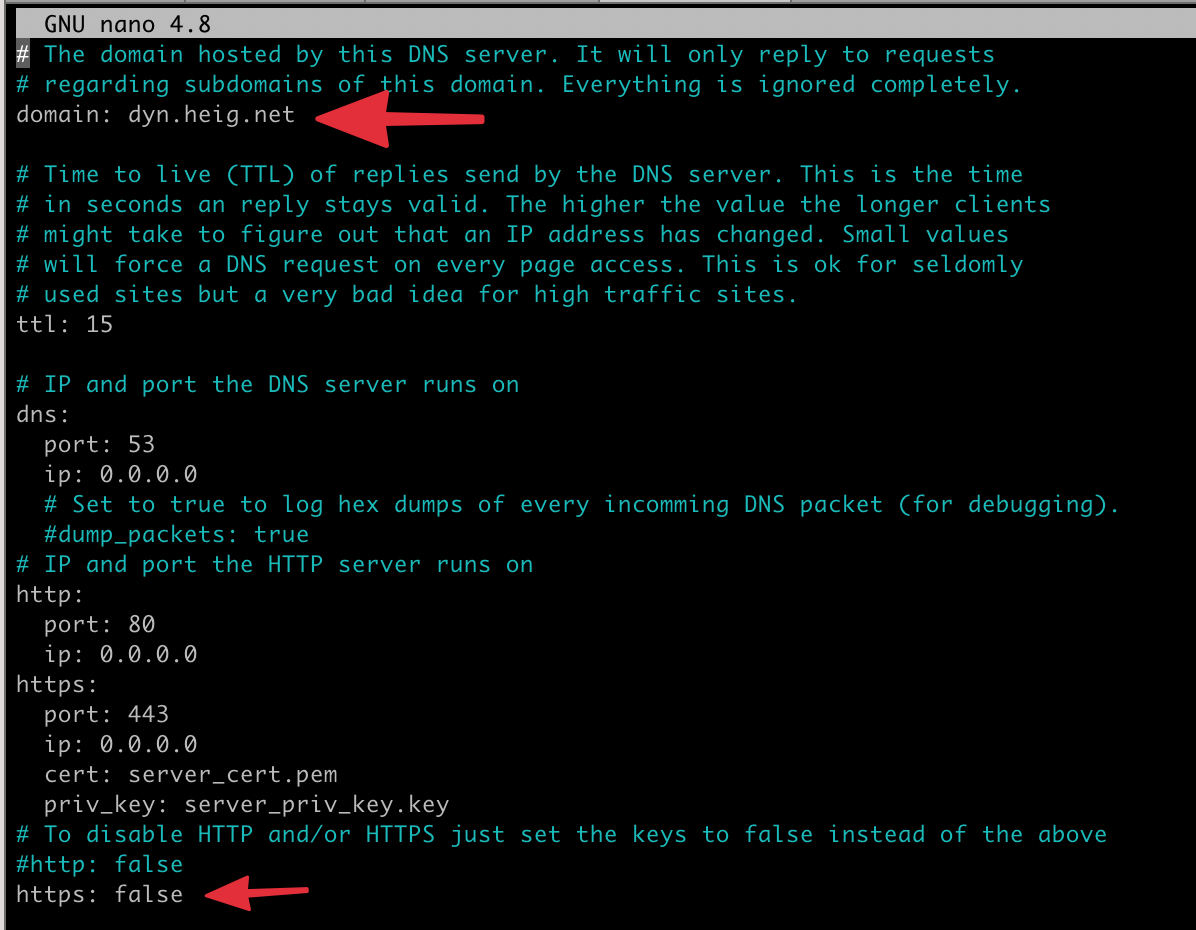
Once your config.yml is finished, open the db.yml and create your entry with a secure password.
---
SERIAL: 2015110200
home:
  pass: bar123
Start it
Simply start the server with
$ sudo ruby dns.rb
2021-01-03 16:06:03 SERVER: Running DNS on 10.0.0.6:53, HTTP on 0.0.0.0:80, as user nobody:nogroup
Hint: You can run this in a screen session to keep it running after logout.
Use it
Not the server is running - but how can you use it to
- retrieve your IP Address
- update your IP Address
DNS Registration
Let's start with the usage of your domains. Head to your DNS Provider and update your DNS Settings with two new entries
- register your Nameserver
- provide a DNS resolvable domain for this server

Now you can reach your server via your domain - in my case dyn.heig.net
Let's test it!
First we need to submit a IP address for our dyndns-domain. Let's use wget to do that
$ wget --user home --password bar123 -O /dev/null http://dyn.heig.net/?myip=123.123.123.123From MAC OS:
$ dig home.dyn.heig.net @dyn.heig.net
; <<>> DiG 9.10.6 <<>> home.dyn.heig.net @dyn.heig.net
;; global options: +cmd
;; Got answer:
;; ->>HEADER<<- opcode: QUERY, status: NOERROR, id: 46137
;; flags: qr aa rd; QUERY: 1, ANSWER: 1, AUTHORITY: 0, ADDITIONAL: 0
;; WARNING: recursion requested but not available

;; QUESTION SECTION:
;home.dyn.heig.net.     IN  A

;; ANSWER SECTION:
home.dyn.heig.net.  15  IN  A   123.123.123.123

;; Query time: 98 msec
;; SERVER: x.x.x.x#53(x.x.x.x)
;; WHEN: Sun Jan 03 20:48:58 CET 2021
;; MSG SIZE  rcvd: 51
That looks good :) Our DNS Server returns the IP address that we provided it.
Update of the IP Address
Of course we need to update this on a regular basis to match our chaning public IP address.
I have provided you a bash-script to achive this in my github: https://github.com/heig/dynDNS-updater-script
Download the script and update the variables in the top:
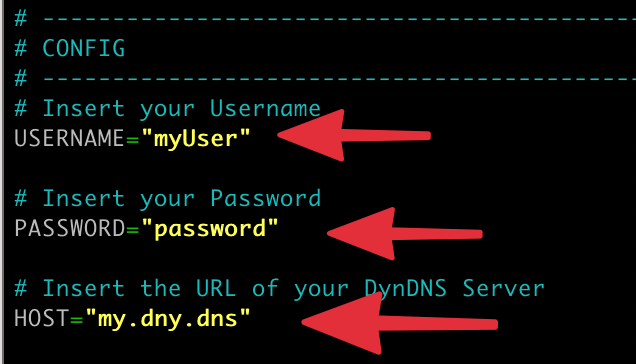
Now you run this script and it will update the record to your current IP address.
Run the script as CRON JOB
To run this script every few minutes, you can run it as cronjob on a raspberry for example. Just update your crontab by this line:
# DynDNS IP Upate
*/5 *   * * *   root    /opt/dyndns/update.sh