The auto provisioning of IP Phones is not a new thing. It's been around for many years and with AnyNode 4.2 it has been introduced in AnyNode and can be used for SIP Phone Registrars.
It basically uses the information from the SIP Registrar Node & SIP Directory to configure the phone on boot. The phone is identified by MAC address. At the moment AnyNode provides Templates for Gigaset devices, but I use SNOM devices so I had to create my own Template :)
Update: Template for M300 is also available now. See here
In this article, we go over the
- Setup of the Provisioning Server
- Setup of the Device Configuration & Template
- Setup of the SIP Directory User
- Setup of the SNOM Phone
- Testing the Provisioning Server with curl
How to setup the Provisioning Server
Frist you need to create the Provisioning Server. Go to Auxiliary Objects and Provisioning Servers.
Add a new Privisioning Server:
First choose your SIP Registrar:
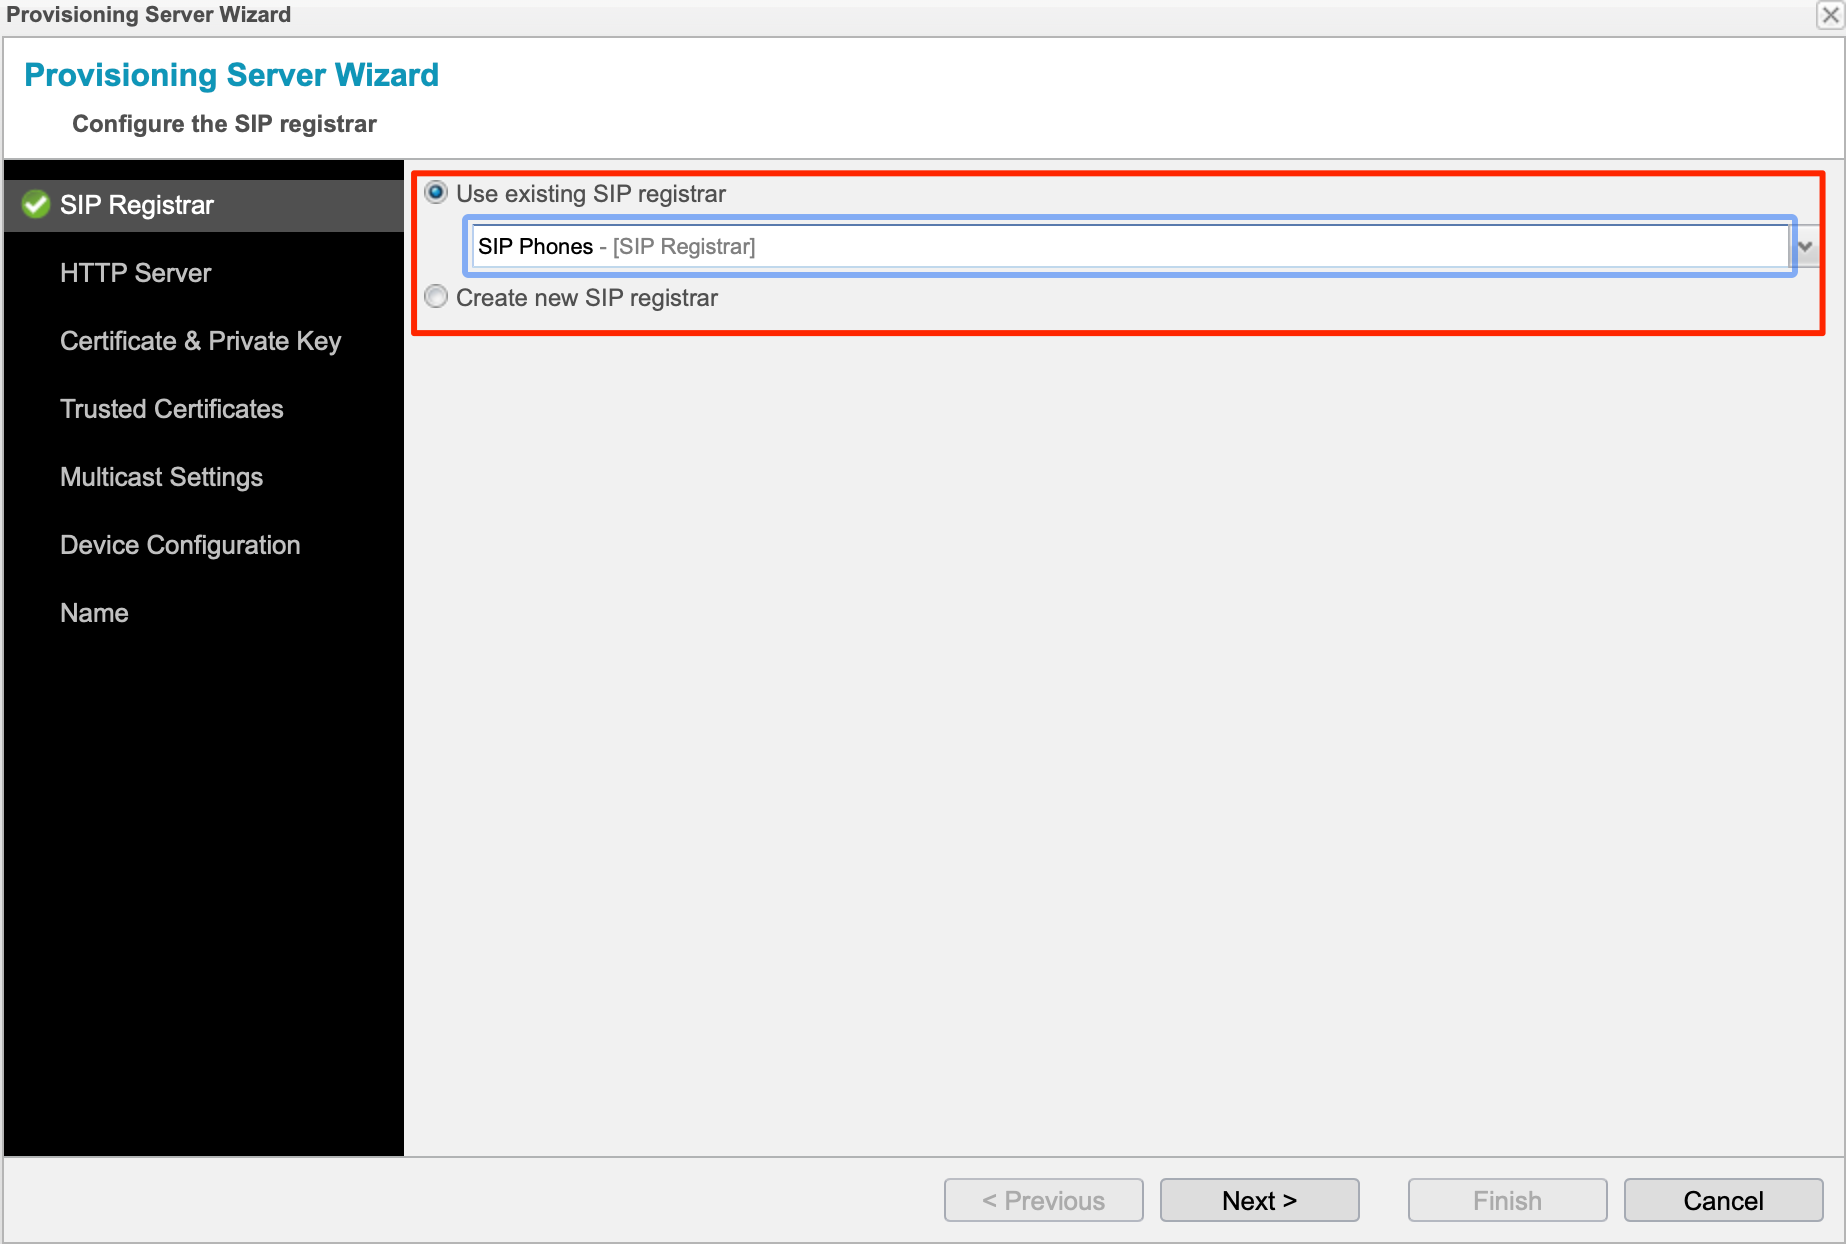
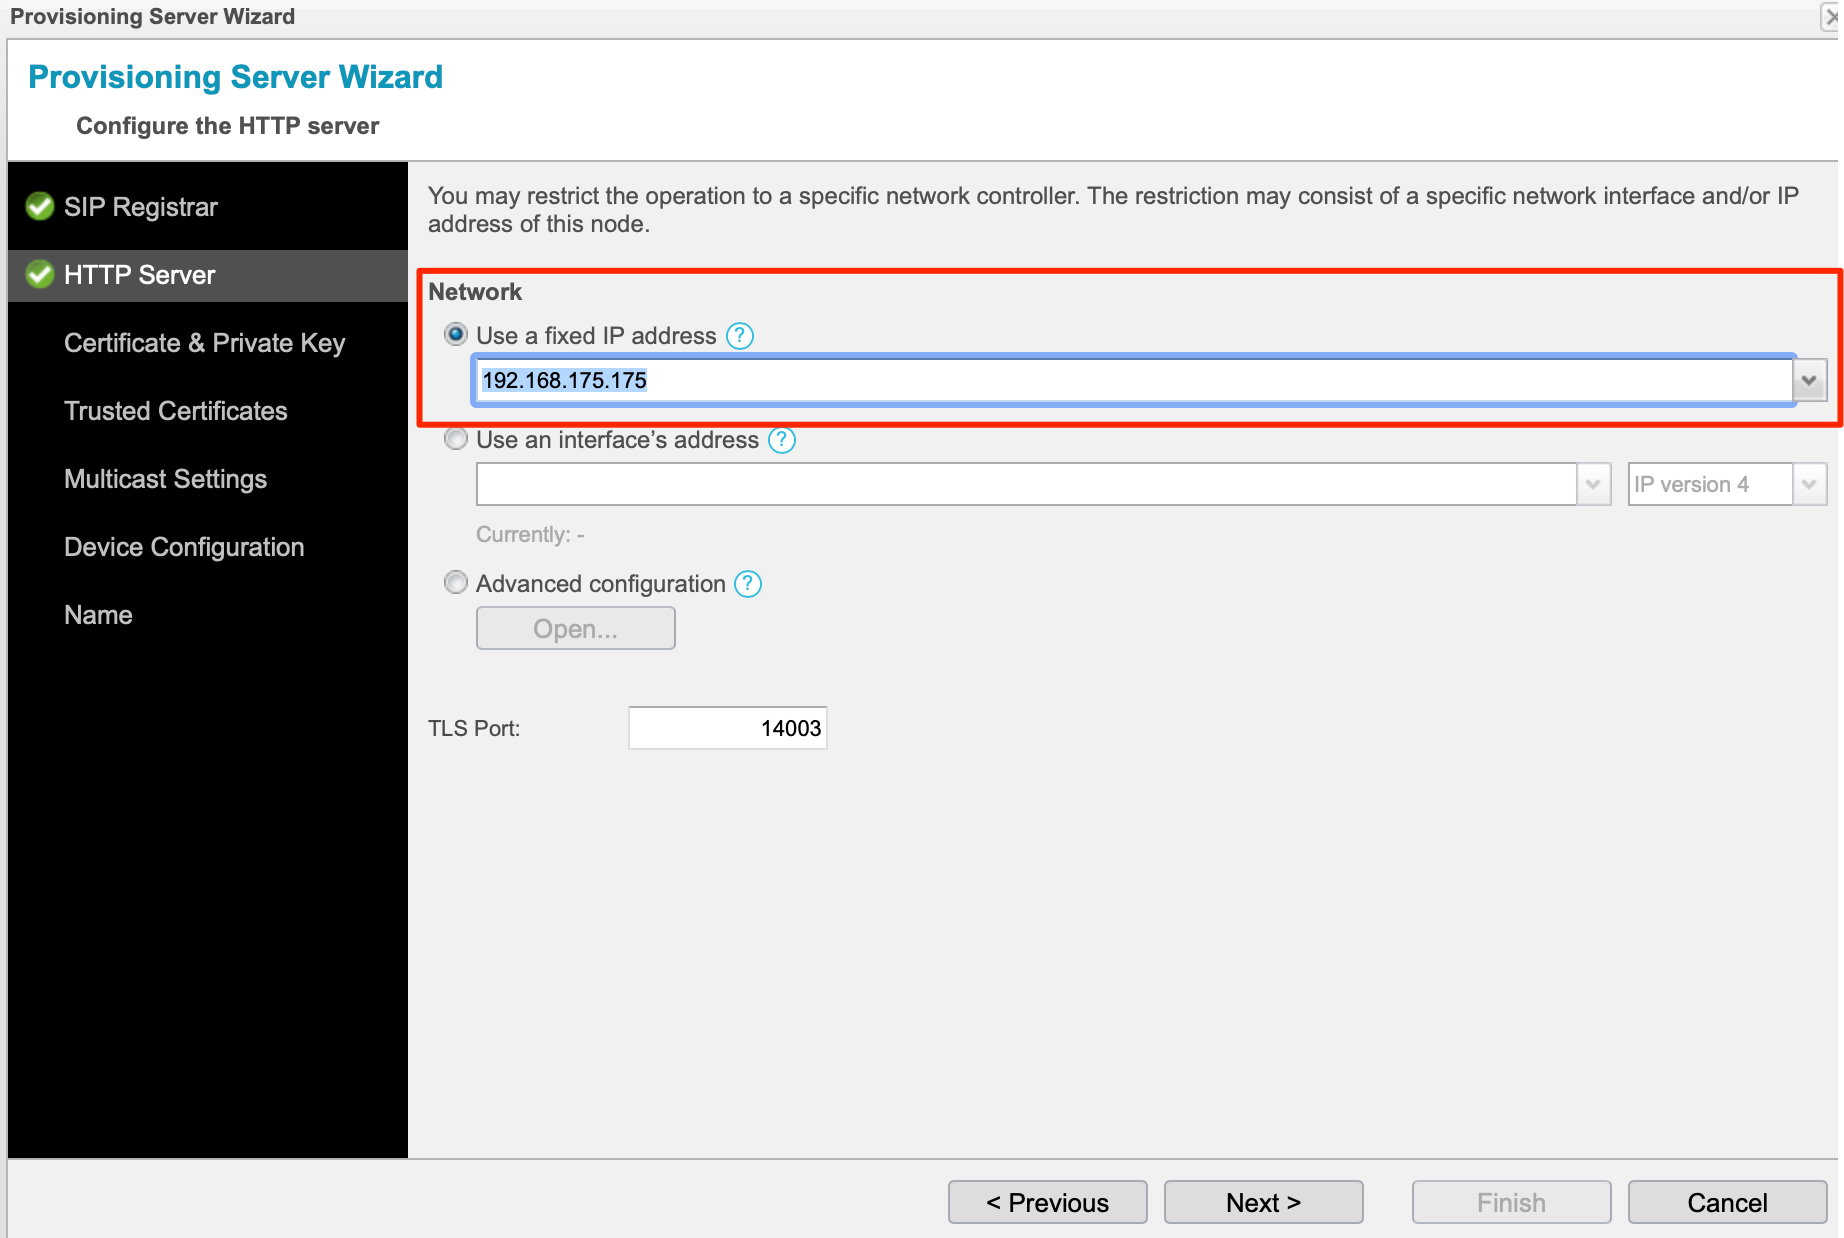
Since I use a a Active/Passive Setup with a shared virtual IP Address, I choose this IP:
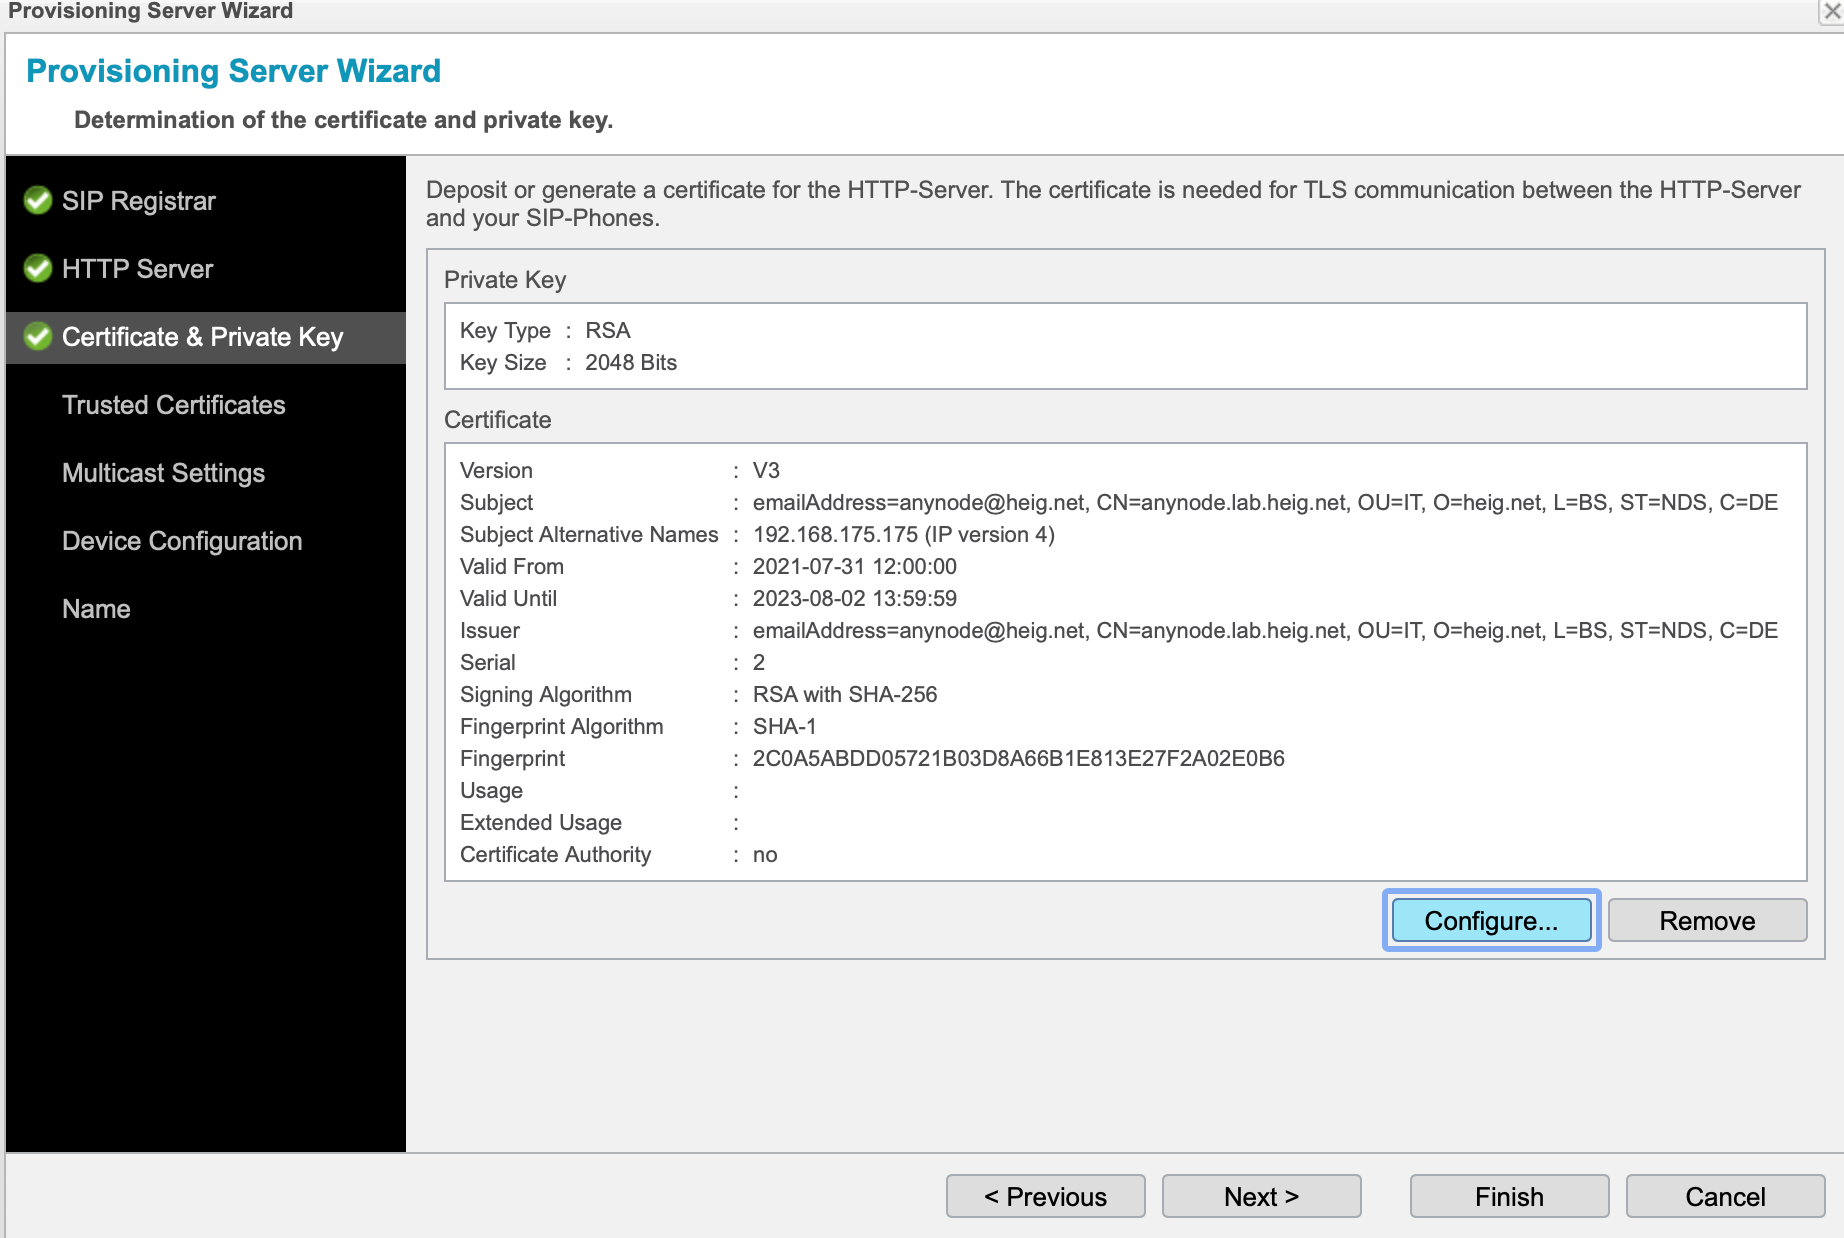
Upload or generate a certificate
Select if you would like, you can setup a multicast responder to respond to phones that search at boot up via multicast.

Since I don't use a Gigaset, I did not import any template.

Choose a name and select finish.

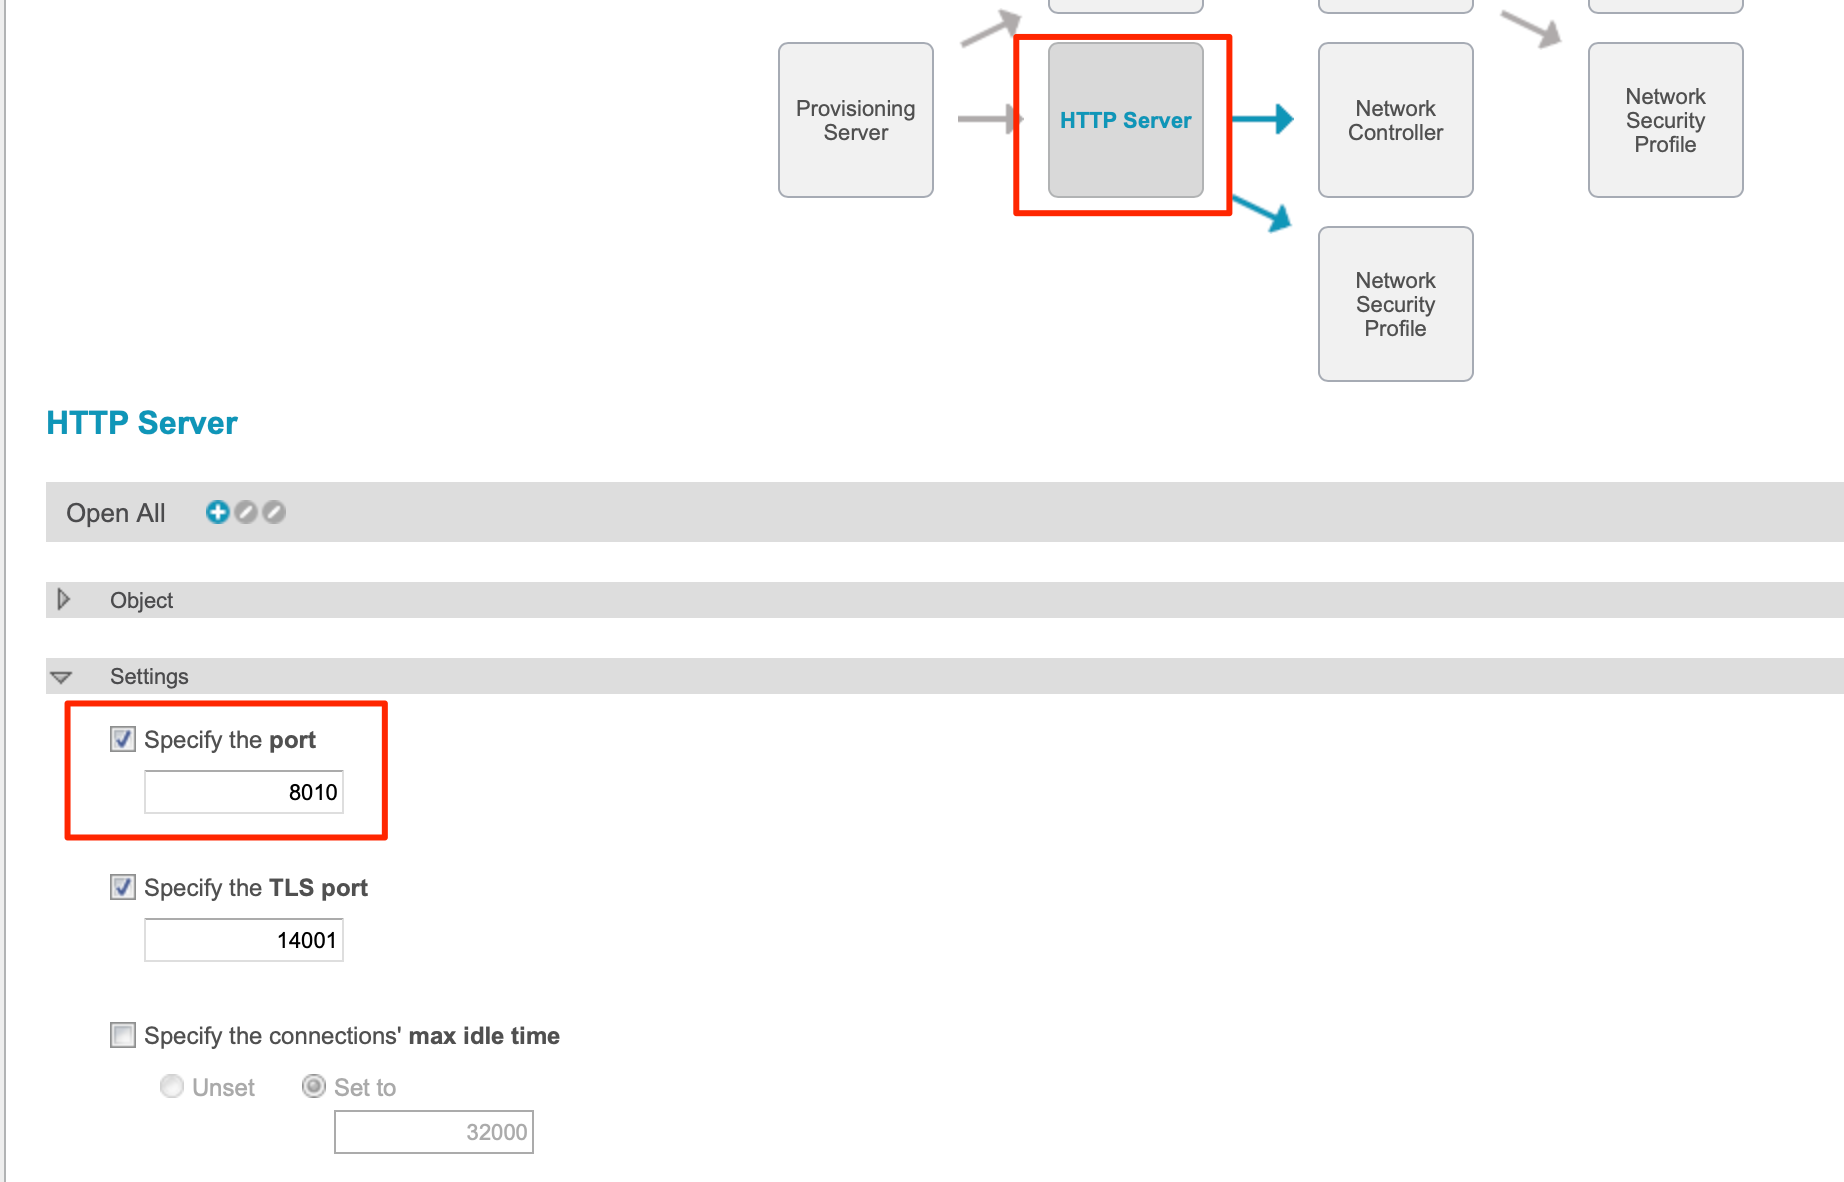
Enable HTTP
I wanted to use HTTP instead of HTTPS (easier to debug...) so I enabled the TCP Port in the HTTP Server:
Import the Template
The template consists of a XML file that gets filled using variables. There are several built in ones like
- ANPROV_DISPLAY_NAME
- ANPROV_AOR_USERNAME
- ANPROV_AUTH_USERNAME
- ANPROV_AUTH_PASSWORD
- ANPROV_SIP_ADDRESS
- ...
but you can also define custom variables.
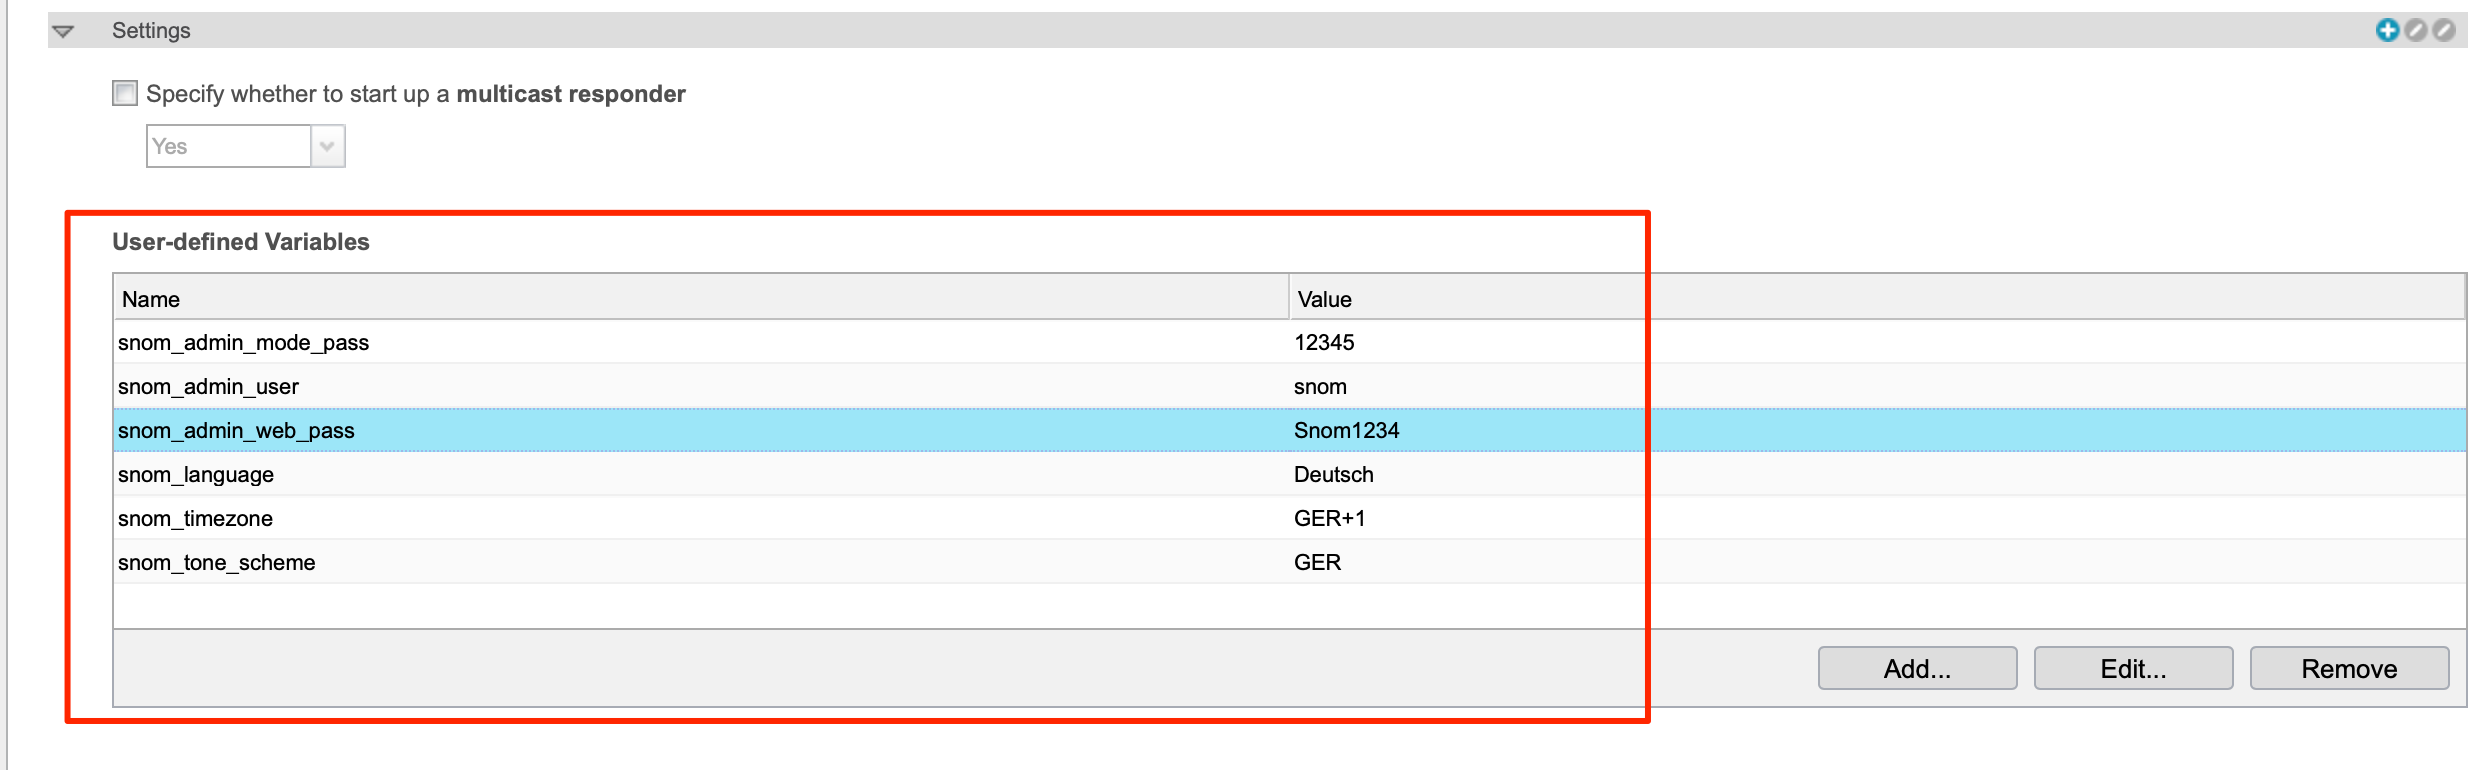
I created a few User-defined Variables in the Template to configure the phones:
- snom_admin_mode_pass
- snom_admin_user
- snom_admin_web_pass
- snom_language
- snom_timezone
- snom_tone_scheme
Setup the Device Configuration
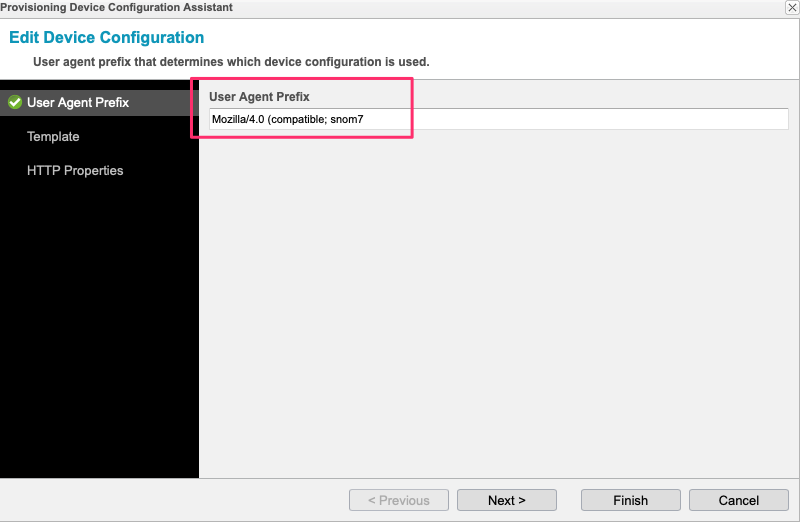
AnyNode uses the User Agent of the phone to identifiy the devices and serve the correct template.
The phone identifies itself as Mozilla/4.0 (compatible; snom710-SIP) in the User Agent. So we use this as prefix in the first wizard page:
On the next Page, configure the Template and upload it to the Editor (Template Lines). In the formatting, select the Content Type and Character Set.
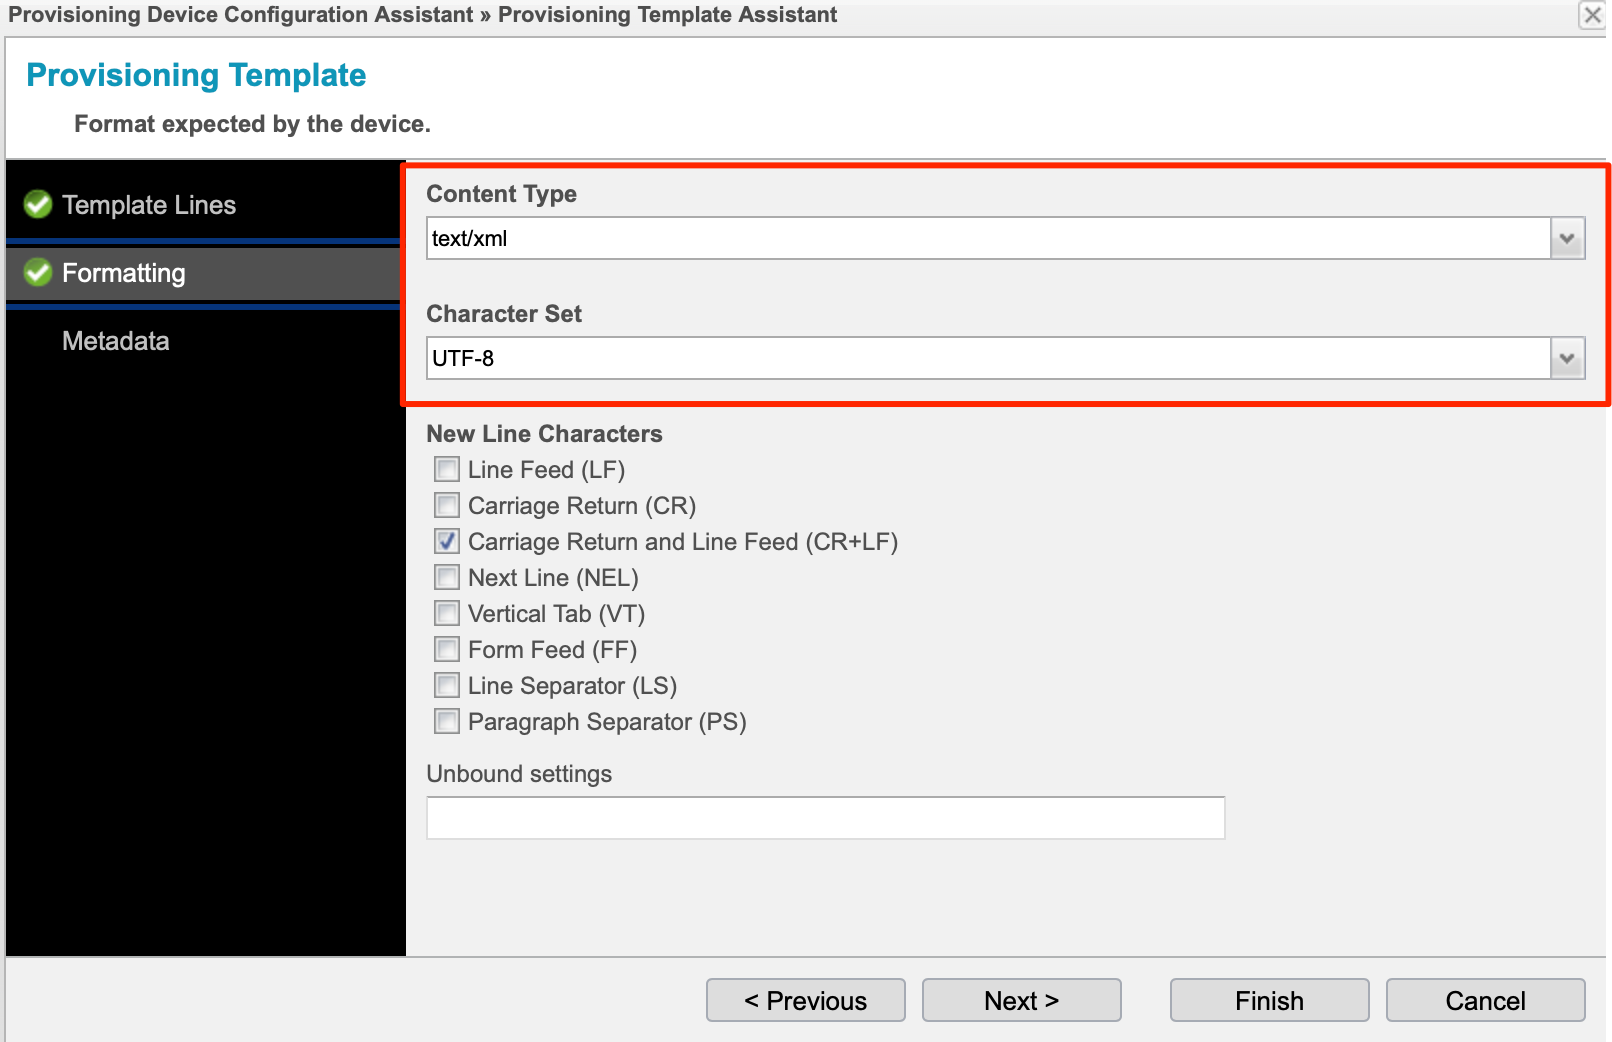
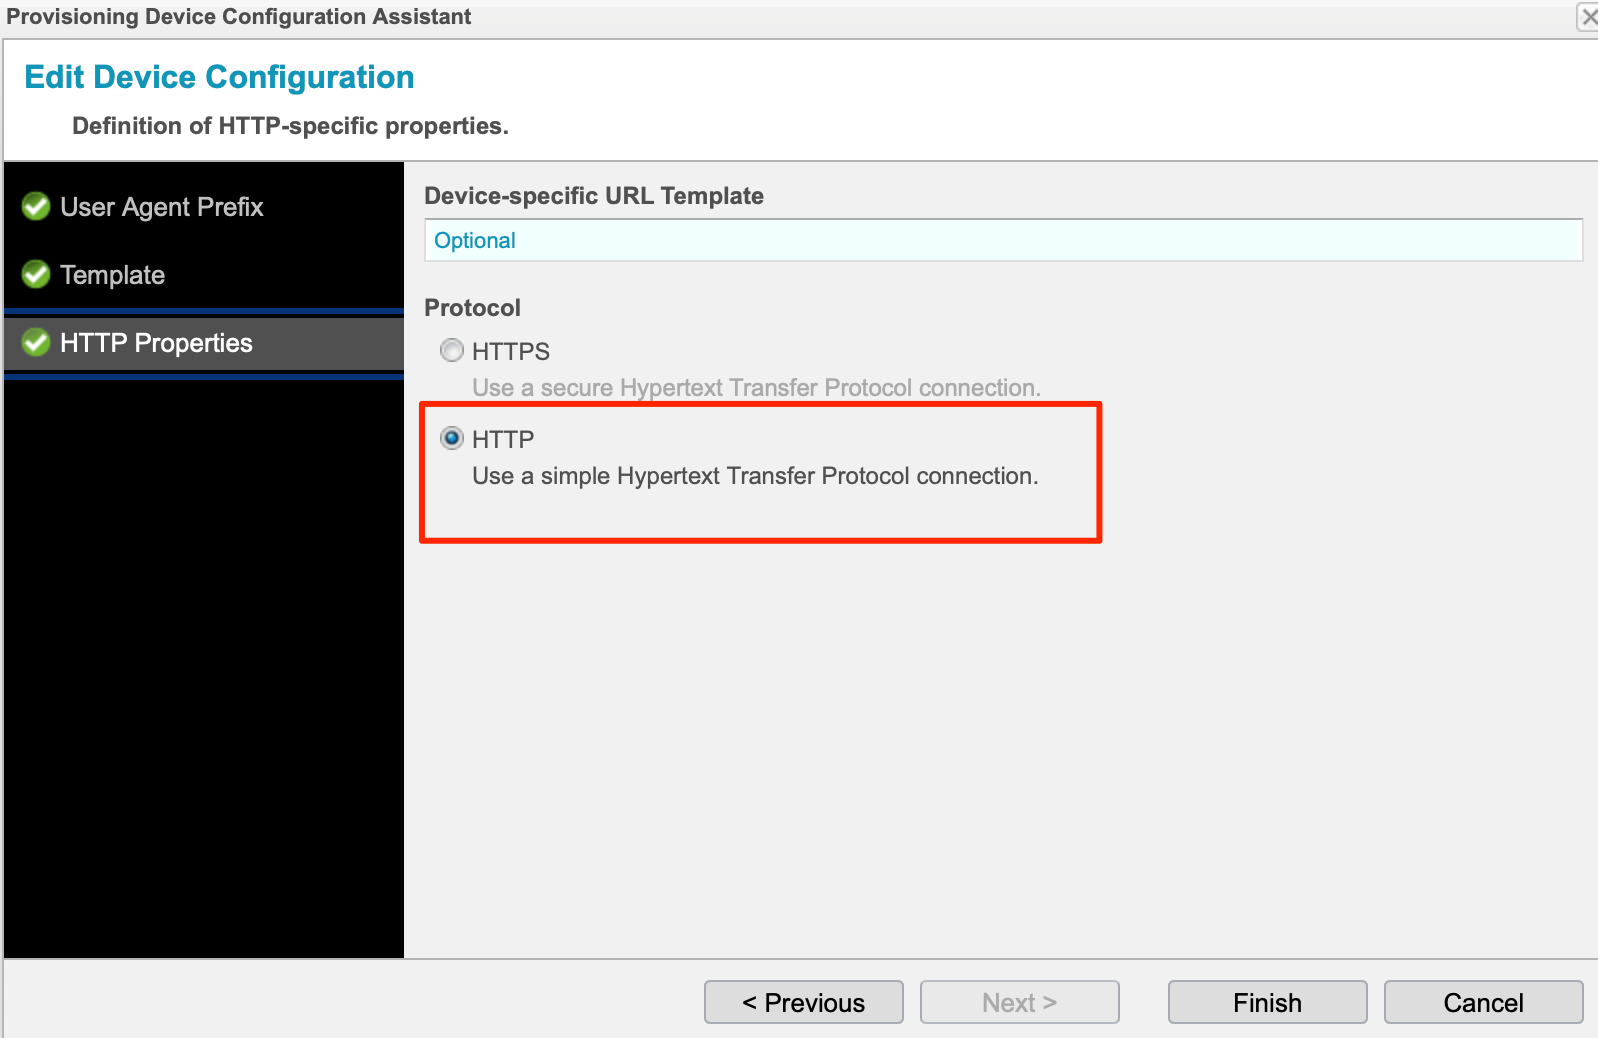
At the end, select the Protocol Type HTTP and select Finish.
Template
The lastest version is available on my GitHub Page
<?xml version="1.0" encoding="utf-8"?>
<settings>
  <phone-settings>

    <setting_server perm="R">http://{% $ANPROV_SIP_ADDRESS %}:8010/{mac}.xml</setting_server>

    <language perm="RW">{% $snom_language %}</language>
    <web_language perm="RW">{% $snom_language %}</web_language>
    <date_us_format perm="RW">off</date_us_format>
    <dialnumber_us_format perm="RW">off</dialnumber_us_format>
    <timezone>{% $snom_timezone %}</timezone>
    <tone_scheme>{% $snom_tone_scheme %}</tone_scheme>

    {% for user in ANPROV_USERS %}
            {% if user.ANPROV_SUB_ID %}

    <user_active idx="{% $user.ANPROV_SUB_ID xml %}" perm="RW">on</user_active>
    <user_realname idx="{% $user.ANPROV_SUB_ID xml %}" perm="R">{% $user.ANPROV_DISPLAY_NAME xml %}</user_realname>
    <user_name idx="{% $user.ANPROV_SUB_ID xml %}" perm="R">{% $user.ANPROV_AOR_USERNAME xml %}</user_name>
    <user_pass idx="{% $user.ANPROV_SUB_ID xml %}" perm="R">{% $user.ANPROV_AUTH_PASSWORD xml %}</user_pass>
    <user_pname idx="{% $user.ANPROV_SUB_ID xml %}" perm="R">{% $user.ANPROV_AUTH_USERNAME xml %}</user_pname>
    {% if ANPROV_SIP_UDP_PORT %}
    <user_host idx="{% $user.ANPROV_SUB_ID xml %}" perm="R">{% $ANPROV_SIP_ADDRESS %}:{% $ANPROV_SIP_UDP_PORT xml %}</user_host>
    {% end %}
        {% elif ANPROV_SIP_TCP_PORT %}
    <user_host idx="{% $user.ANPROV_SUB_ID xml %}" perm="R">{% $ANPROV_SIP_ADDRESS %}:{% $ANPROV_SIP_TCP_PORT xml %}</user_host>
    {% end %}

    {% end %}
            {% else %}
            {% warning no sub-id set for account %}
            {% end %}
        {% end %}

    <admin_mode_password perm="">{% $snom_admin_mode_pass %}</admin_mode_password>
    <http_user perm="">{% $snom_admin_user %}</http_user>
    <http_pass perm="">{% $snom_admin_web_pass %}</http_pass>

  </phone-settings>
</settings>
Setup the Directory
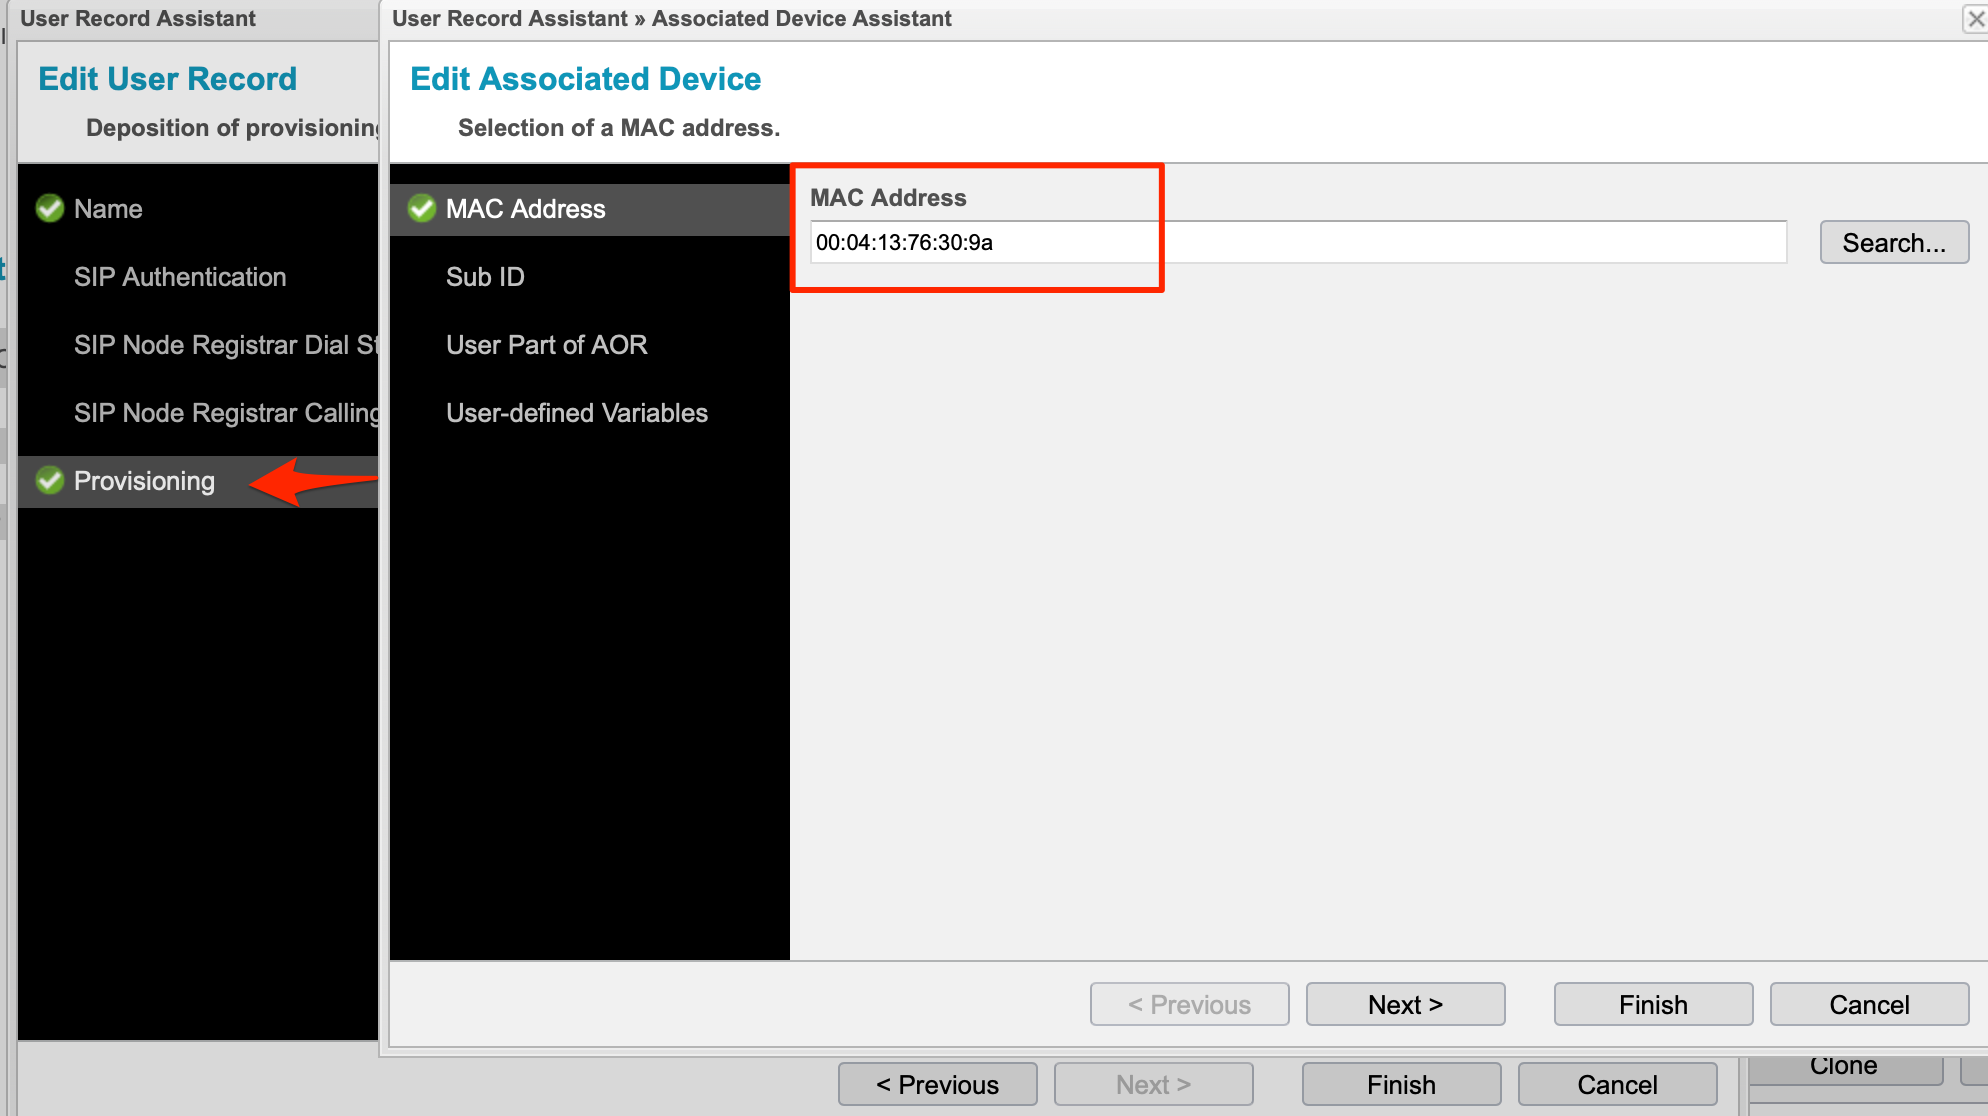
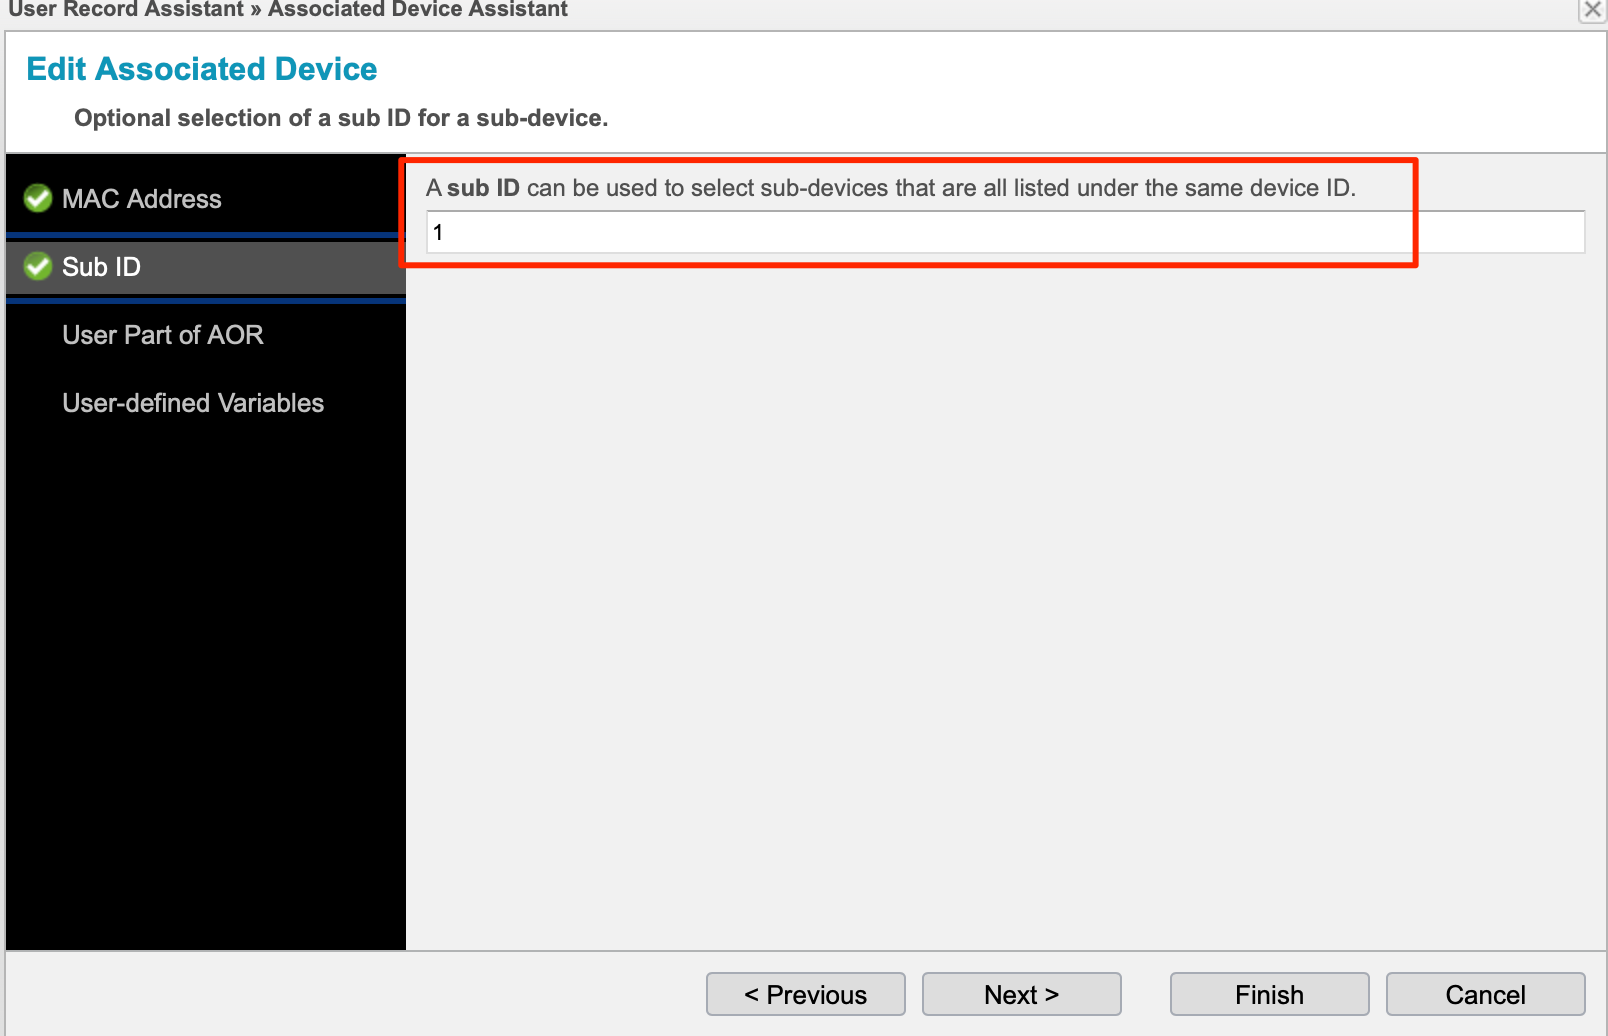
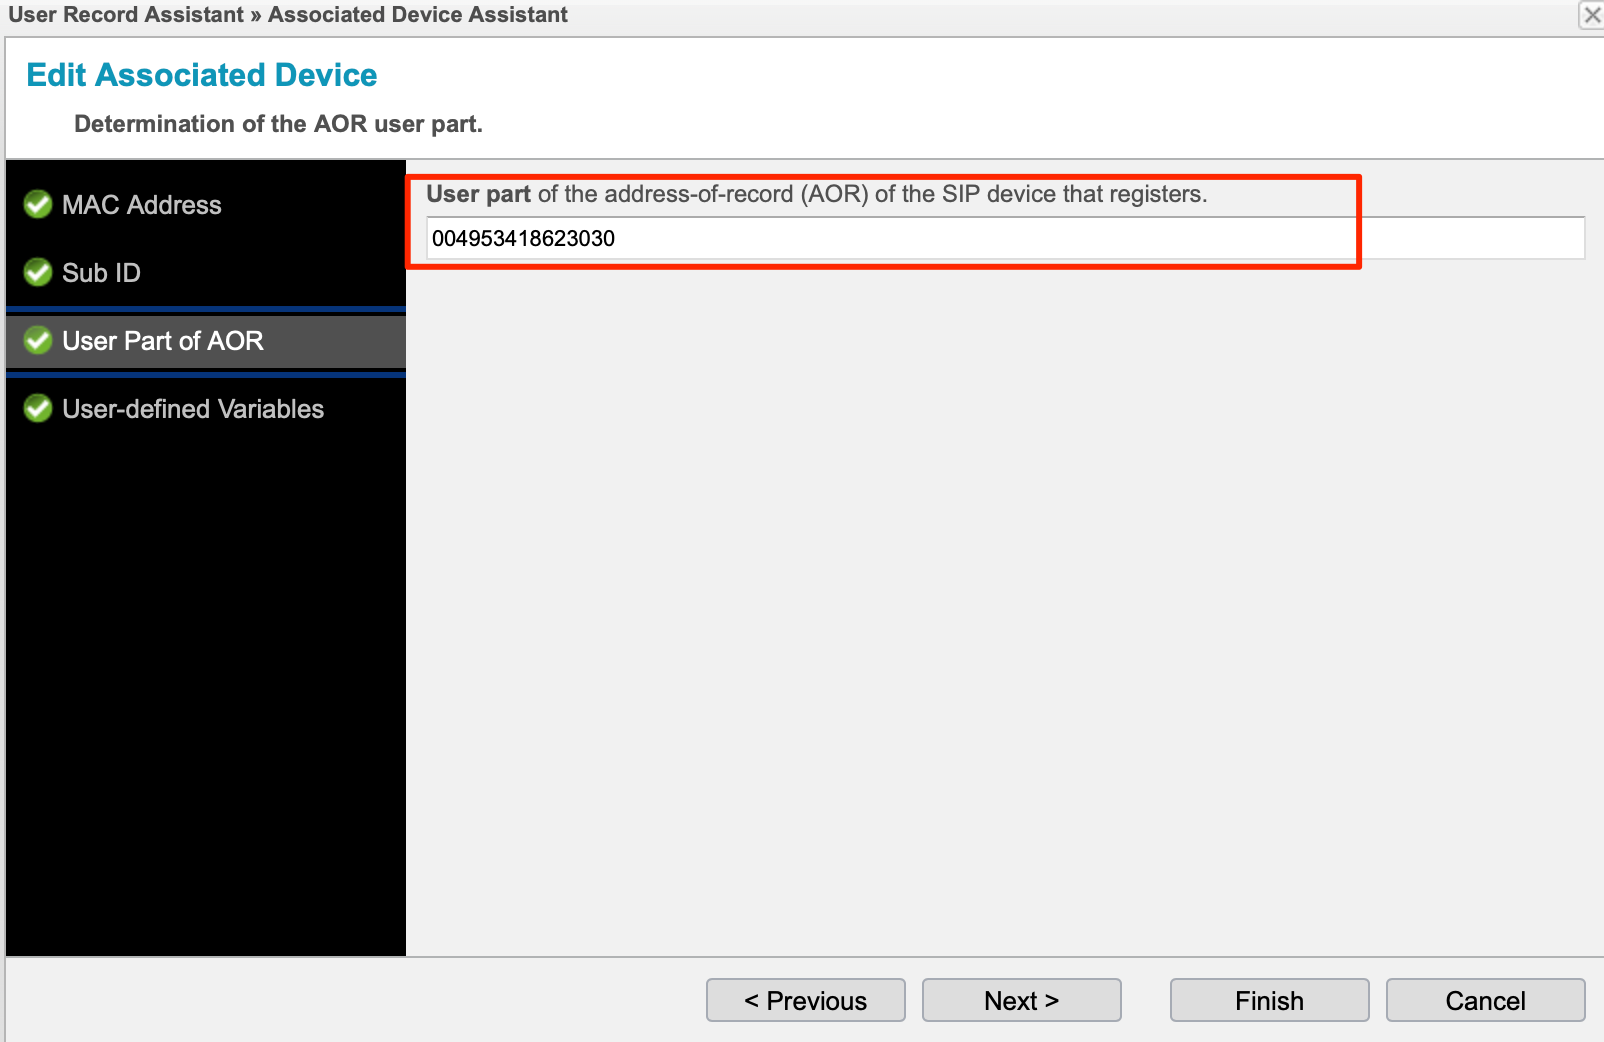
Edit your SIP user and go to the Provisioning tab. Enter the MAC Address of the phone, set the Sub ID and the AOR. That's it. The Sub ID is used to iterate through SIP Users if there is more than one enabled for a phone. Start with 1.
How does it work?
There are different possibilities to configure the phone. You can either configure it manually in the phone or use DHCP.
DHCP
- The phone raises a DHCP request
- It looks for options 66 & 67 for the IP / Hostname of the provisioning server and filename.
Look at the SNOM documentation for more information.
Manual
In my case, I used option A because my DHCP Server does not allow to configure Option 66 with a Port ("192.168.175.175:8010").
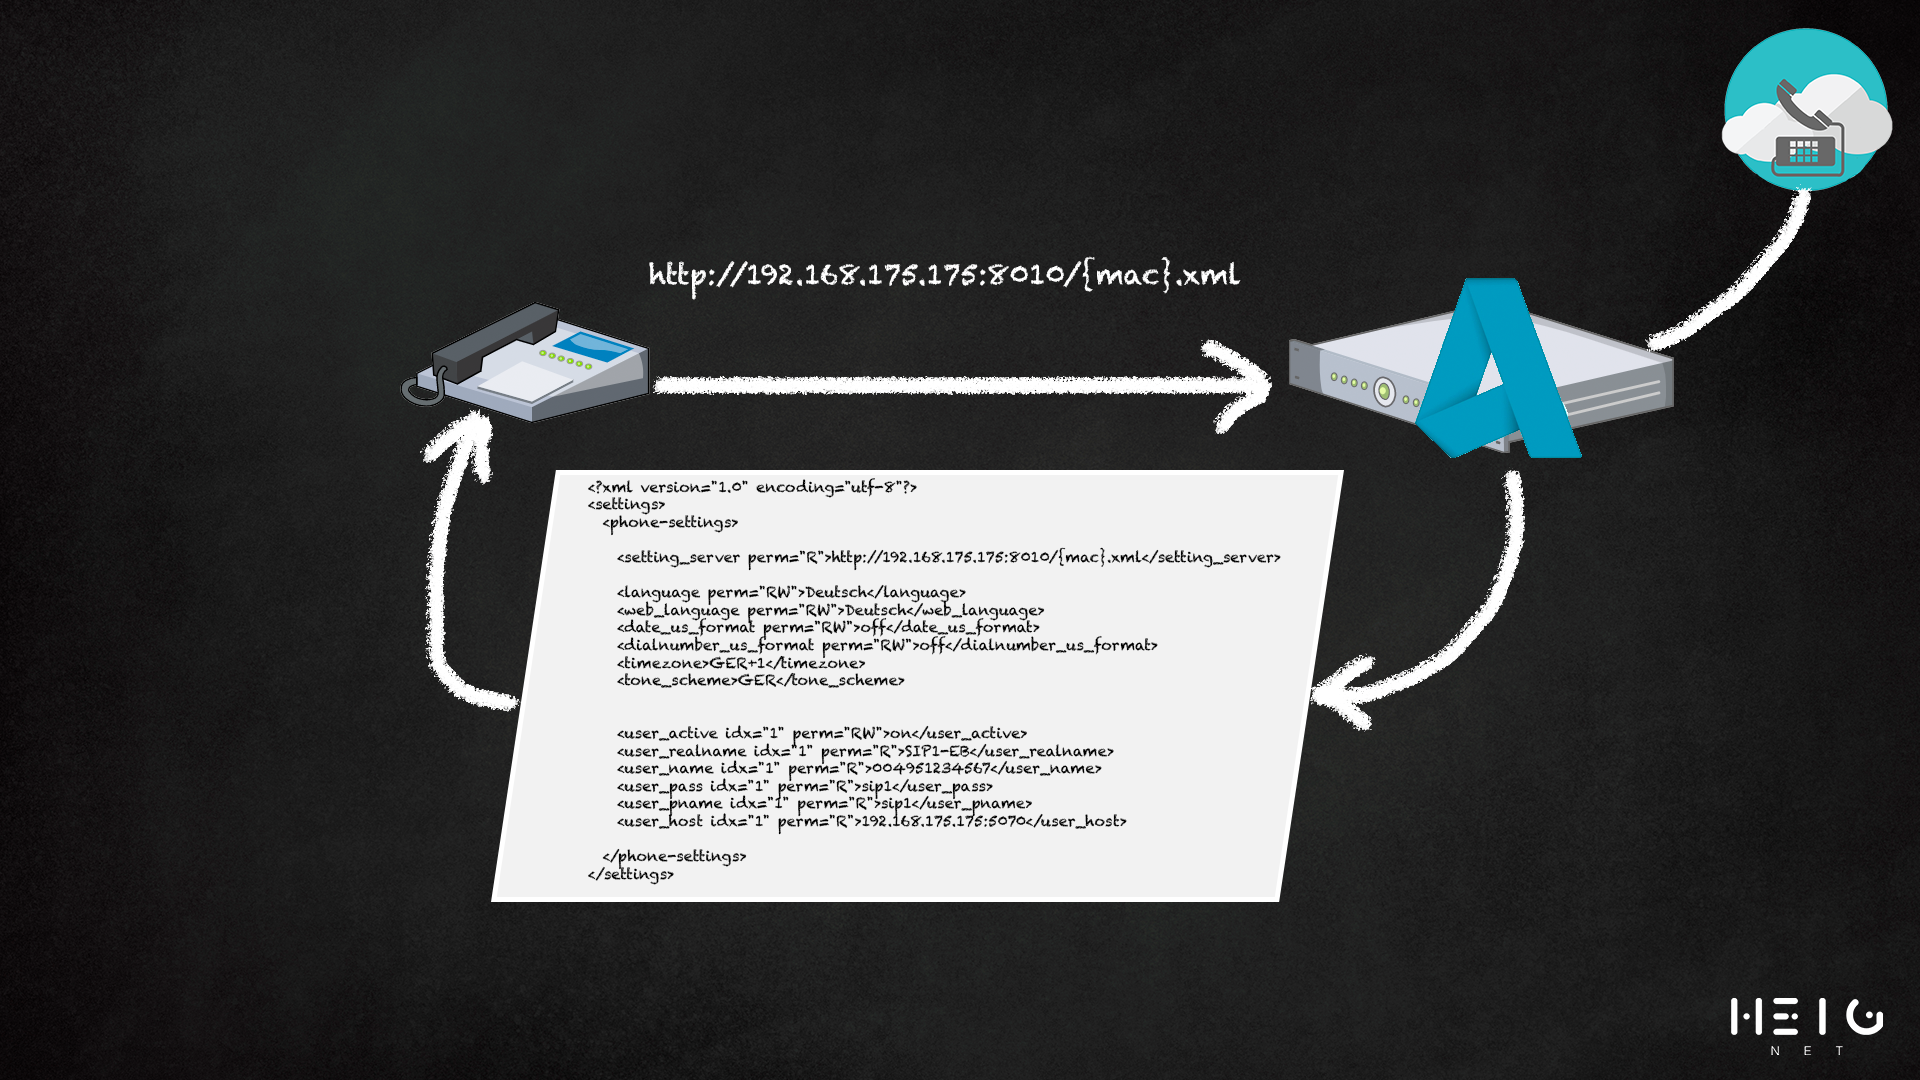
Setting URL: http://192.168.175.175:8010/{mac}.xml
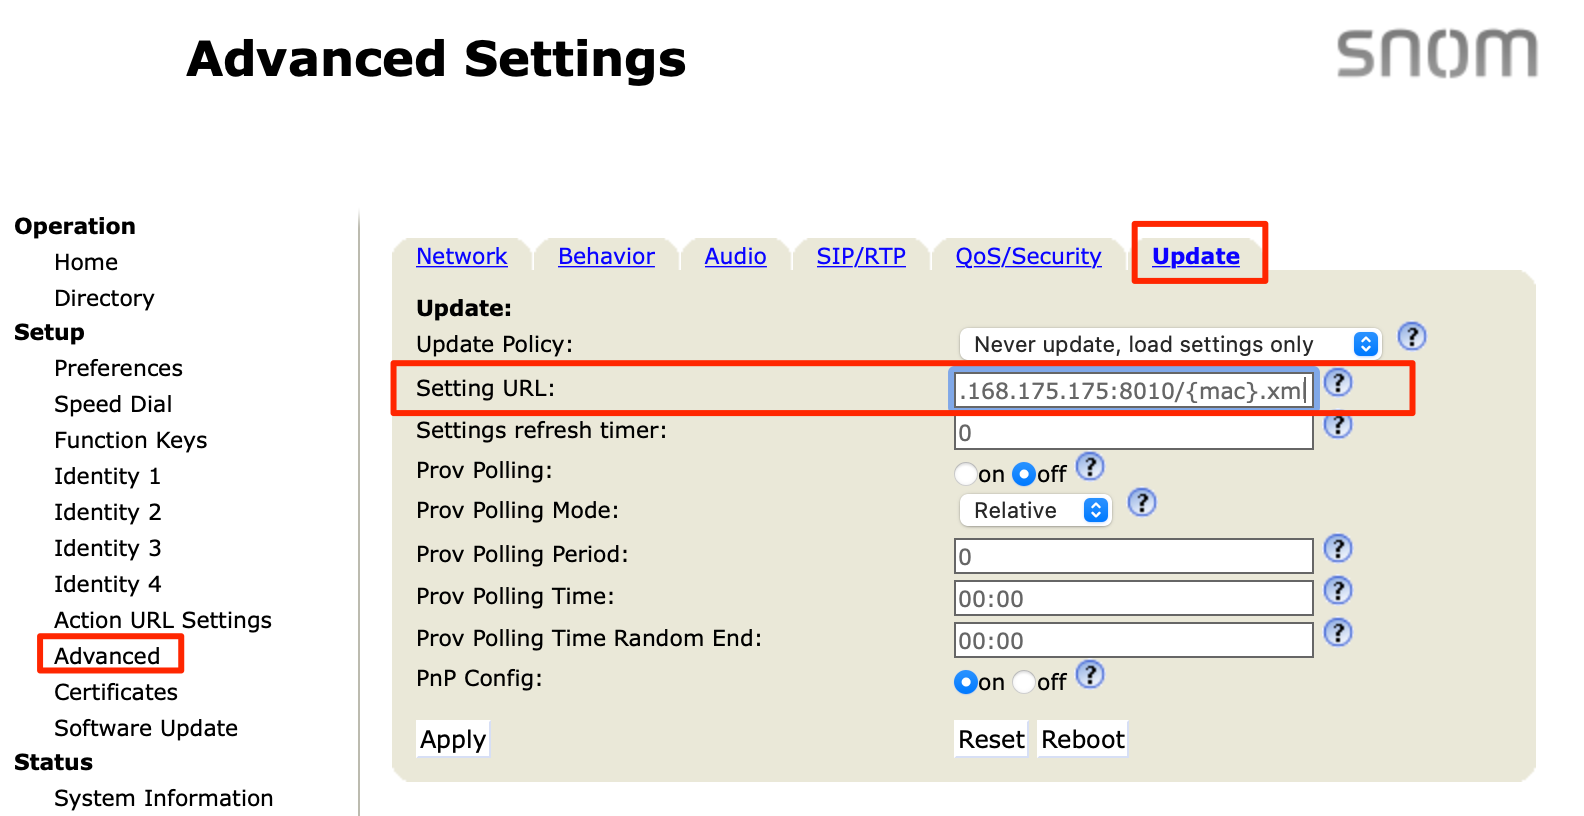
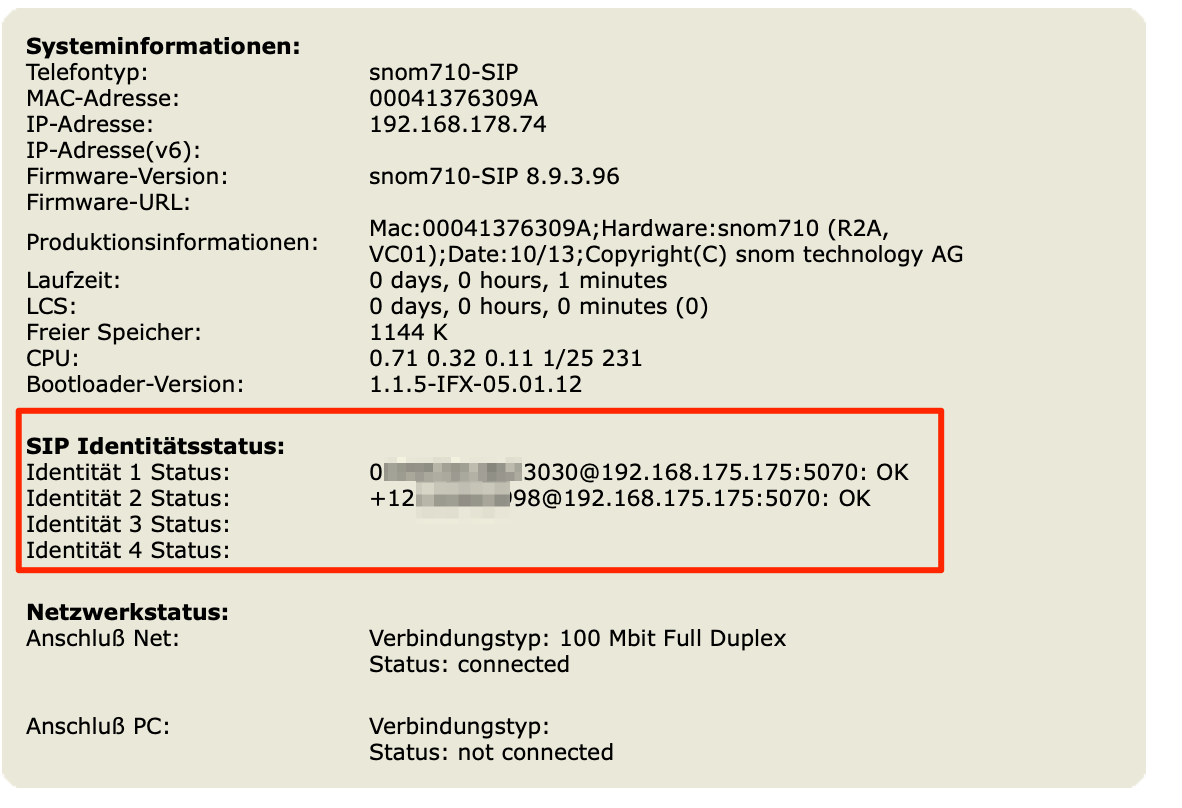
After a reboot, the phone is configured for the assigned SIP accounts.
How to test it?
Of couse you need to test the provisioning server and see the output for debugging and testing.
I used curl to check the configuration, because it's easy to change the User Agent:
$ curl -A "Mozilla/4.0 (compatible; snom710-SIP 8.9.3.96 1.1.5-IFX-05.01.12 00041376309A SXM:0 UXM:0)" http://192.168.175.175:8010/00041376309A.xmlThe output gives the XML File with the configuration:
<?xml version="1.0" encoding="utf-8"?>
<settings>
  <phone-settings>

    <setting_server perm="R">http://192.168.175.175:8010/{mac}.xml</setting_server>

    <language perm="RW">Deutsch</language>
    <web_language perm="RW">Deutsch</web_language>
    <date_us_format perm="RW">off</date_us_format>
    <dialnumber_us_format perm="RW">off</dialnumber_us_format>
    <timezone>GER+1</timezone>
    <tone_scheme>GER</tone_scheme>

    <user_active idx="1" perm="RW">on</user_active>
    <user_realname idx="1" perm="R">SIP1-EB</user_realname>
    <user_name idx="1" perm="R">004953XXXXXXXX</user_name>
    <user_pass idx="1" perm="R">sip1</user_pass>
    <user_pname idx="1" perm="R">sip1</user_pname>
    <user_host idx="1" perm="R">192.168.175.175:5070</user_host>

    <user_active idx="2" perm="RW">on</user_active>
    <user_realname idx="2" perm="R">SIP2-Chime</user_realname>
    <user_name idx="2" perm="R">+121XXXXXXXX</user_name>
    <user_pass idx="2" perm="R">sip1</user_pass>
    <user_pname idx="2" perm="R">sip2</user_pname>
    <user_host idx="2" perm="R">192.168.175.175:5070</user_host>

    <admin_mode_password perm="">12345</admin_mode_password>
    <http_user perm="">snom</http_user>
    <http_pass perm="">Snom1234</http_pass>

  </phone-settings>
</settings>
Conclusion
With the new provisioning server it's easy to setup new templates and configure nearly every phone that allows provisioning. If you create any templates, please consider sharing it!